
All materials © 1997-2000 by Wesley A. Fryer
wfryer@tenet.edu
INTERMEDIATE
COURSE
www.wtvi.com/html
- Targets/Anchors/Bookmarks:
Linking within a webpage
- Tables: Displaying data in rows
and columns
- Images: Colors, imagemaps, and
animations
- Multimedia: Inserting sound
clips, movies, and more
- Frames: Displaying several
webpages at once
- Guestbook: An introduction to
forms
- Uploading
webpages
Extras:
- PDFs: Creating and inserting Adobe's
cross-platform, portable document files
- Javascript Rollover Images: Images
that change when the mouse cursor passes over or clicks them
- HyperStudio: Publishing
stacks directly on the web

1. TARGETS / ANCHORS /
BOOKMARKS
Quick
Reference
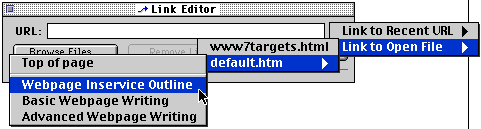
Just as you can create a link which takes visitors to another
webpage, you can create links which take visitors to a different
place on the same page. You can also create a link which takes a
visitor to a specific place on another webpage. This is done by
creating anchors, which are also called "targets" or
"bookmarks."
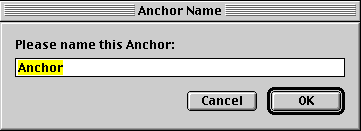
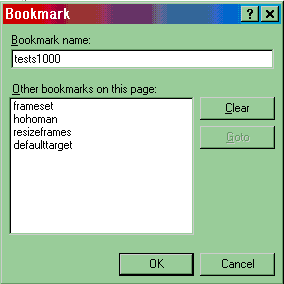
Step 1: Create Anchors
- Anchors are like index tabs in a notebook. You can quickly
select a tab and turn to a specific part of the notebook.
- First, move to the place on your webpage where you want
visitors to quickly link to. Click the mouse once at the beginning
of this section.
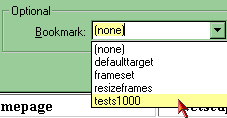
Step 2: Link to the Anchor
Targets are especially helpful on long documents. They can be used
effectively in a table of contents or for bibliographic citations.
The paper "American
POWs in Southeast Asia and the Violation of a National Ethic"
(http://www.wtvi.com/wesley/powmia/powpap8.html) uses targets as
precise links to the bibliography.
Another example of effectively used anchors/bookmarks is this
list of
AR books.
As a practice assignment, save this
sample webpage and modify it to:
- include anchors/bookmarks for tests that are multiples of
100
- include "Return to Top" links beside the tests that are
multiples of 100
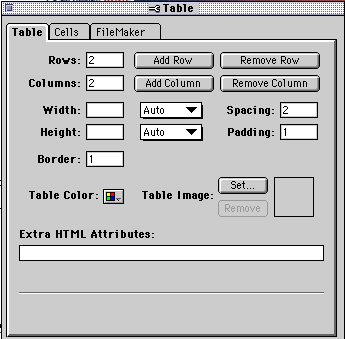
2. TABLES
Quick
Reference
If you want more control over the relative placement of graphics
and text on your webpages, you need to use tables.
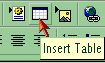
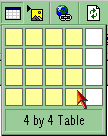
Enter and format text in the table:
- Click in each cell and type your text or insert pictures.
Formatting choices are the same but can vary between cells:
|
left aligned
|
Bold Text
|
|
right aligned
|
Red
Text
|
|
centered
|
Linked Text
|
|
|

|
Edit table cell
settings
|
|
Claris Homepage
|
Netscape Composer
|
MS Frontpage 2000
|
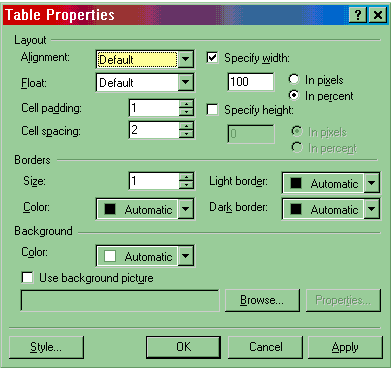
- Double click on one of the cell grid lines to display
the "table options window."
- Click on the "Cells" tab at the top of the window. It
is circled in red in the image below:
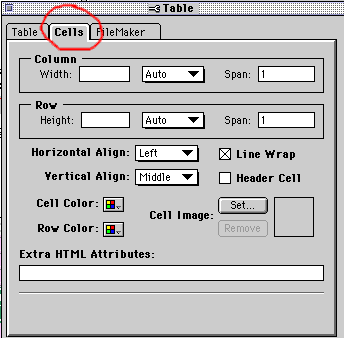 - SPAN: Make one row extend across the entire
table by entering the number of columns in your table in
the box next to "Span." In the example below, I made the
first cell have a column span of "3."
- ALIGNMENT: If you have more text or an image
in a cell, you might want to choose Vertical Align =
Top.
- COLORS: Again, beware that older browsers
don't display individual cell background colors or
background images.
- In the example below, the top row has a column span
of "3".
|
|
- Right click the cell you want to format and choose
CELL PROPERTIES:
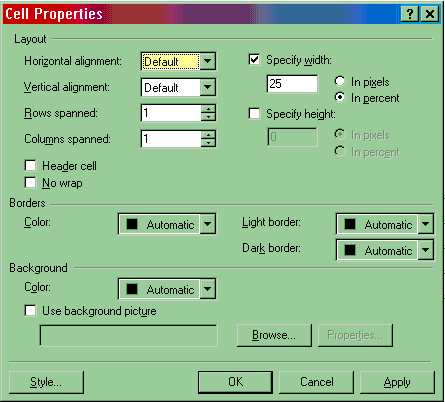
- Change SPAN, ALIGNMENT, COLORS,
etc. as desired (see descriptions to the left).
|
|
Gold
Text
|
|
Here is an example of white
text, which is so long that it wraps to the next line. Since
this cell has more information than others, I have selected
cell alignment options in the cells to the right. The cell
below is blank, and therefore does not even have the
background color displayed.
|
Aligned to the
Top
|
Aligned to the
Bottom
|
|
|

|
Aligned to the
Middle
|
THE TRICKIEST PART: WIDTH AND HEIGHT
- By default, tables will shrink as small as possible to contain
the text in them. If a column contains an image, it will shrink to
the width of the image. This can be seen in the table above.
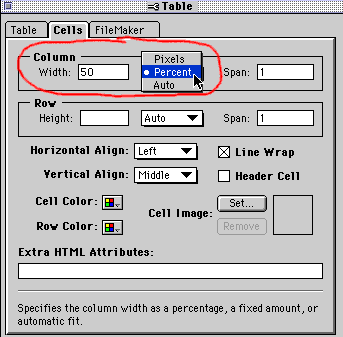
- If you want to change the displayed width of a column, click
into a cell in the column.
- Double click on the cell grid to display the "table options
window."
- Click on "Cells."
- Enter a percentage (like 50%) and choose "percent" next to
Column Width. This setting is circled in red
below:
- Here is what the previous table looks like with the first
column's cell width set to 50%:
|
Gold
Text
|
|
Here is an example of white
text, which is so long that it wraps to the next line. Since
this cell has more information than others, I have selected
cell alignment options in the cells to the right. The cell
below is blank, and therefore does not even have the
background color displayed.
|
Aligned to the
Top
|
Aligned to the
Bottom
|
|
|
|
Aligned to the
Middle
|
- The first column will take up 50% of the window width unless a
column containing an image (like the dog above) wouldn't have
enough space. IMAGES TAKE PRECEDENCE in determining table
column width!
- Resize your browser window to see the different ways your
table is displayed, depending on how large the viewing window
is.
ADVANCED TABLE
TECHNIQUES:
- Use a blank image,
sometimes called a "placer image," to rigidly maintain column
width. (example)
After inserting the image onto your page, change the width as
desired.
- Use templates included with Claris Homepage 3.0 or MS
Frontpage 2000 which are set up with tables.
Webpage
Templates
|
|
Claris Homepage
|
Netscape Composer
|
MS Frontpage 2000
|
- From the FILE menu, select OPEN.
- On your hard drive, find the Claris HomePage folder.
Open the "page_templates" folder.
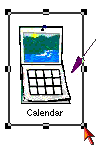
- Open a file like "calendar_monday.htm"
- You can now edit this file and make it your own
calendar.
|
|
- On the FILE menu, point to NEW, click
Page, and make sure the GENERAL tabl is
selected.
- Choose the desired page template.
- You can now edit this file as desired.
|
3. ADVANCED IMAGE
TECHNIQUES
Quick
Reference
In General
- Large images can overwhelm a web page!
- TO CHECK DOWNLOAD TIMES: From the EDIT menu in
Claris HomePage choose Document Statistics.
- Keep image sizes under 40K, no wider than 470 pixels, viewable
on a 13 inch screen
- Save images with simple colors as GIFs.
- Save images with lots of colors (like photographs) as
JPGs.
Image
Formats
- JPEG (Joint Photographic Experrts Group) retains 24 bit
color (millions of colors).
- Can compress JPEG up to 4:1 (lossy compression, some detail
may be lost), compress in PhotoShop.
- GIF (Graphics Interchange Format) developed by
Compuserve.
- Limited to 8 bit color palatte (256 colors)
- Best for simple graphics
- 2 variations of GIF: transparent and animated
Cross-Platform
Considerations
- Macintosh and Windows computers share 216 of the 256 possible
colors in an "8-bit color palette"
- Dithering=the computer combines colored pixels that look
similar as a group to approximate a color not in the palette:
often is a poor estimate
- Use the "Netscape
216 palette" when choosing colors for your webpages
(http://www.homepage.co.uk/webcolour/)
- NonDithering colors: (hex code for HTML)
- Black: 000000
|
Yellow: FFFF99
Light Blue: CCFFFF
Light Purple:
CC99FF
Green: 66FF66
Dark Purple:
6633FF
Light Green:
66CC99
White: FFFFFF
|
- Generally, colors that have the same digits/characters in each
color pair are safe (first two are red, second two are green,
third two are blue)
- Use the Background
Colors webpage to choose colors, if you want to use colors not
included in the Claris HomePage color palette
(http://www.infi.net/wwwimages/colorindex.html).
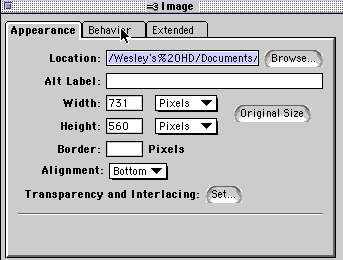
Image tag options
Creating and
using background images
- This webpage has a subdued (ghosted) background image.
- Use the "cookie cutter command" in HyperStudio
(option-command-C) to make background images for your
webpages.
- The background image for this webpage was made using HyperStudio
and Claris HomePage.
- If available, use Adobe
Photoshop or PaintShop
Pro and change the opacity of your layer to make the image
look "ghosted."
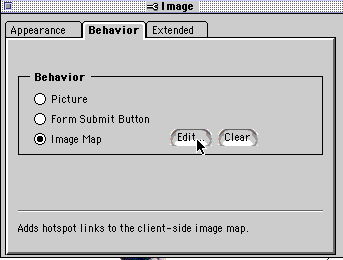
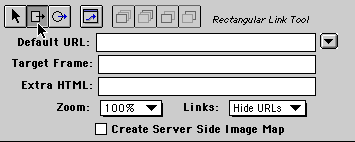
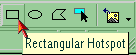
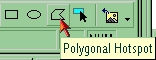
Imagemaps: A webpage graphic
with defined "hotspots" which, when clicked on, serve as links to
other webpages.
- Using GraphicConverter
(Mac), PaintShop
Pro (Win), PhotoShop
(Mac/Win), or another graphics program create an image which will
have "hotspots" and serve as an image map for your website. You
can export an image created with Inspiration
to create an attractive sitemap (Example).
- Key: make it clear where people can click to make something
happen!
- Insert the image
into your webpage that you want to make into an imagemap.
Animated
Graphics
- 3 present methods of online animation:
- Shockwave (MacroMedia Director)
- Java by Sun Microsystems
- Animated GIFs (like a flip book) - most browsers can
display them
- Shareware software is excellent for creating Animated GIFs
- To create an animated GIF with either of these programs:
- Create separate images of the same size that you want in
the animation (For example, using GraphicConverter).
- In the animation software, import the images and specify
image preferences (like the delay between frames). The steps
for GifBuilder are:
- From the FILE menu, choose ADD FRAME (or press
Command-K)
- Locate the image you want to use as the first frame of
your animation, and click OPEN.
- Repeat these steps for all the images/frames you want to
include.
- From the EDIT menu, choose SELECT ALL.
- From the OPTIONS menu, choose INTERFRAME DELAY. Either
choose "AS FAST AS POSSIBLE" or specify a delay as a
fraction of a second.
- From the OPTIONS menu, choose LOOP and click FOREVER (or
a specified number of times). Click OK.
- From the ANIMATION menu, choose START to preview your
animation.
- From the FILE menu, choose SAVE.
- Name your file (make sure the extention remains ".gif")
and save it in your website folder.
- Insert the saved image in your webpage like any other
image.
Considerations when designing for
TV (from MacWorld Dec 96 p. 173)
- avoid 1 pixel lines, since they seem to flicker as the TV
scans odd and even lines alternatively
- NTSC colors are those viewable on TV
- Photoshop NTSC colors filter will automatically substitute
non-NTSC colors
- avoid text fonts with thin stems and serifs
- "tight text" is bad
- good fonts are Helvetica Medium or bold, and Century
Schoolbook
- Smallest font size to use: 14 point
- heavily saturated colors (red/yellow) are prone to "blooming":
(spreading to adjacent lines, due to RGB limits)
Other
Cool Tricks
- When entering an alternate text label for an image, use the
text Loading..... This works especially well for very
graphics intensive pages which take longer to load. (Example)
- Use a freeware or shareware program to create photo thumbnails
(small versions of each photo) linked to larger versions. A page
of thumbnails is faster to load and allows visitors to more
quickly browse for pictures they are interested in.
 Photopage:
freeware - Creates both thumbnails and corresponding HTML pages
with the linked pictures in a table layout. (Example)
Photopage:
freeware - Creates both thumbnails and corresponding HTML pages
with the linked pictures in a table layout. (Example) GalleryMaker:
$30 shareware - Creates both thumbnails and corresponding HTML
pages with the linked pictures in a table layout.
GalleryMaker:
$30 shareware - Creates both thumbnails and corresponding HTML
pages with the linked pictures in a table layout.
- Insert <lowsrc=file> in the image reference tag to
display a B&W version while a color JPEG image loads
- In Frontpage, right click the toolbar at the top of the screen
to turn toolbars on or off:
4. MULTIMEDIA
Quick
Reference
Obtain
Sound Clips or Movies
- Download free QuickTime software at http://www.apple.com/quicktime/download/
- Use the HomePage movie library, which includes Quicktime
movies and Quicktime VR object and panorama movies.
- Locate a webpage that contains a sound file or movie clip you
would like to include on your webpage. You first need to save a
copy of it onto your computer's hard drive.
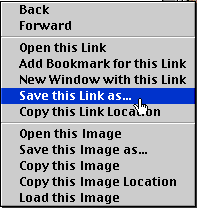
- To do this within Netscape, click on the link which plays the
sound or movie and hold down the mouse (for Macintosh) or click
once with the RIGHT mouse button (for Windows). From the pop-up
menu, choose "Save this Link as..." or "Save Target As...."
- Choose the folder/directory on your hard drive where you want
to save the file. Usually, it is handy to save media files in the
same image folder where your other graphics are located.
Make sure you save the movie with the
three character extension ".mov" at the end. Otherwise, it will
not display properly for visitors to your website.
- MIDI files and other audio files (including CD tracks in AIFF
format) can be converted into Quicktime movies. An example of a
website using a CD recording as a background sound inserted as a
Quicktime movie is available at: http://www.uscavalry.org/defaultmusic.htm
- For a more thorough, step by step guide to obtaining
multimedia elements, refer to the online workshop "Multimedia
Madness: Obtaining Images, Movies, and Audio Files from the
Internet and CD-ROMs" at http://www.lubbock.k12.tx.us/rush/downloads/multimedia/.
Insert a Movie
Clip
|
|
Claris Homepage
|
Netscape Composer
|
MS Frontpage 2000
|
- Move your saved quicktime movie into your website
folder. (sample)
- Click on the spot where you want the movie
displayed.
- From the INSERT menu at the top of the screen,
select QUICKTIME MOVIE...
- Find the movie you saved on your hard drive, select
it, and click on OPEN.
- Double click on the movie to set its
options:
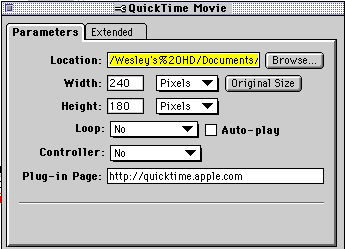
- You can choose to change the display size, make the
movie loop over and over, auto-play (start playing
immediately once loaded), and display a movie
controller.
- Alternatively, you can MAKE A LINK to your
movie file instead of inserting it into a webpage.
|
|
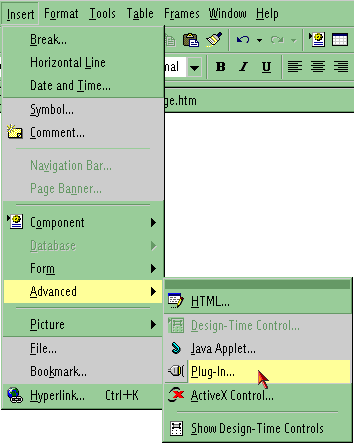
- Click on the spot where you want the movie displayed.
(sample)
- From the INSERT menu at the top of the screen,
select ADVANCED and then
PLUG IN.
 - Click the browse button and select the movie you want
to insert.
- Enter text you want displayed if viewers do not have
the correct plugin. This can include a link where the
plugin can be obtained.
- Click OK to close all dialog boxes.
- Alternatively, you can MAKE A LINK to your
movie file instead of inserting it into a webpage.
|
Play a Sound
File
5. FRAMES
Quick
Reference
Setting
Up a Webpage with Frames
A webpage using frames actually uses several different webpages at
once. An example is Woodbridge School in Great Britain (http://www.woodbridge.suffolk.sch.uk/).
1. Create pages to be included
The first thing you need to do is create the webpages which will
be put together. I suggest creating:
A navigation page that list links, which will be
displayed in a narrow frame on the left side of the screen
(Save this page as nav.html)
An information page, which will be displayed in the large main
window to the right of the navigation page. (Save this page as
main.html)
2. Create a "Frame
Set"
|
|
Claris Homepage
|
Netscape Composer
|
MS Frontpage 2000
|
- First, open both your navigation page and your
information page in Claris HomePage.
- From the FILE menu, choose NEW and then
FRAME PAGE. Then click OK.
- Click in the boxes next to the pages you want to
include in the frame-set: your navigation page and your
information page. Leave the frame orientation set to
"Vertical."
- The two pages should now be displayed in the left and
right half of the screen.
|
|
- On the FILE menu, point to NEW, click
Page, and then click the FRAMES PAGES tab.
- Click a frames page template (VERTICAL SPLIT).
- When you click a template, FrontPage displays a
thumbnail showing that template's frames layout in the
Preview area.
- It also displays a summary and suggested use of
the template in the Description area.
- Click the SET INITIAL PAGE button in the left
frame.
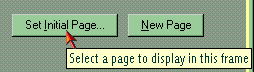
- Locate and select nav.html
- Click the SET INITIAL PAGE button in the right
frame.
- Locate and select main.html
|
3. Resize
frames
|
|
Claris Homepage
|
Netscape Composer
|
MS Frontpage 2000
|
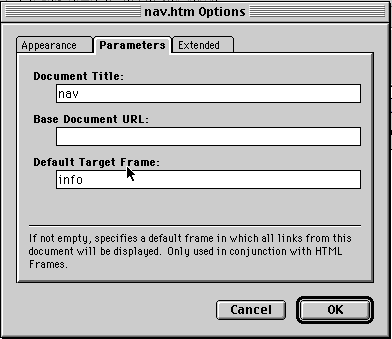
- Double click on the left frame.
- Enter a name like "nav" beside "Frame Name."
- Click on the "Appearance" tab. Set the SIZE
to 20 percent.
- Click on the right frame.
- Enter a name like "info" beside "Frame Name."
- Click on the "Appearance" tab. Set the SIZE to
80 percent.
|
|
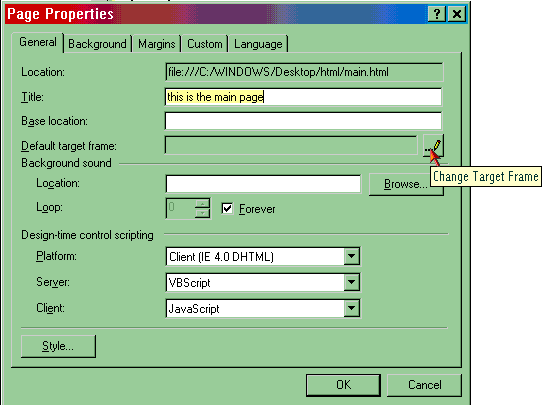
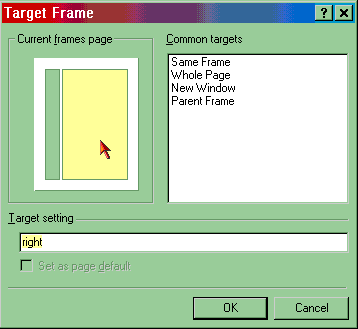
- Right click the left frame and choose FRAME
PROPERITES.
- Beside WIDTH, change the popup menu from RELATIVE to
PERCENT.
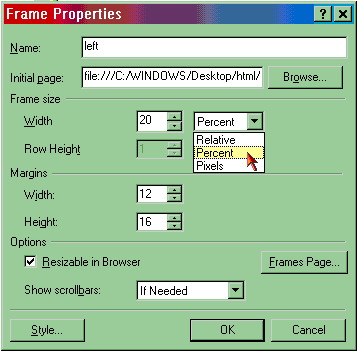
- Change the number beside WIDTH to 20
|
View the Finished Webpage Using
Frames
6. GUESTBOOK
Quick
Reference
Modify an existing
guestbook
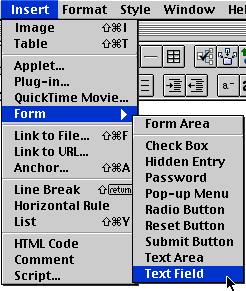
- Creating a "guestbook" which visitors to your website can fill
out and automatically email to you requires creating a
FORM. Insert form elements in HomePage by selecting the
"Insert" menu at the top of the screen, and then "Form," followed
by your desired form item:
 (In Frontpage, select INSERT, then FORM, then
FORM again.)
(In Frontpage, select INSERT, then FORM, then
FORM again.)
- All the form elements must be included in a defined "Form
Area," which you can insert from the same menu.
- You can create a form webpage with HomePage or Frontpage, but
it generally cannot work until you create a CGI program for
the server which processes the information and creates an email
message. CGI stands for "Common Gateway Interface." (If your
server as Frontpage 2000 extensions installed, you can use those
instead, but those procedures aren't covered here.)
- If you are interested in learning more about CGI and Perl,
which is a common scripting language used to write CGIs, many
resources are available (links on the website).
SIMPLE GUESTBOOK/FORM
SOLUTION:
- The easiest way to create a guestbook or other web form is
modify an existing form which is setup to use a CGI program that
will run anywhere (most CGIs will just work for webpages on the
same server). This type of webpage is available for you to use! To
use it:
- Save this workshop evaluation page
into your website folder. (right click the link and choose SAVE
LINK AS on Windows or click the link and hold down the mouse on
a Macintosh.)
- Open this saved page in your webpage editor and modify it
as desired.
- More info on using this form type is available from
Freedback.com.
- The key ingredient which will make this form work for you is
the address to which the webpage will "Post" its data:
http://cgi50.freedback.com/mail.pl
- This free CGI script was originally offered for public use by
a MIT grad student, now a private company has taken over the
service. As a result, after submitting a form visitors will see
some advertising banners. This is the trade-off for using a free
CGI form.
- CGI programming can easily become complicated. Understanding
of and modification of CGI scripts are part of the webmastering
TEKS for Technology, however. Good luck!
7. UPLOADING
WEBPAGES
Quick
Reference
Uploading webpages means "publishing" your pages so other people
on the internet can view them. Publishing a web is basically copying
the files from your computer to a destination, such as a Web server
or a disk. ALL the resources referenced in your webpages must be
included in these copied files.
If you have set up the "skeleton" of folders and files correctly
on your hard drive, you will need to create directories on your
server account that correspond to your folder names, as described in
Section 2. You will also need
to upload all HTML and image files into these directories from their
corresponding folders.
In some cases, other individuals may handle uploading for you. In
this case, you probably will save your webpages onto a disk.
Alternatively, you can create
a compressed "zip" file composed of your website and send it as an
email attachment to someone else to upload.
If you have to upload webpages yourself, first obtain the address
of your account on the server. Also obtain your password.
Carefully note uppercase and lowercase letters! Record this
information and store it in a safe place for future reference.
Sources for free
webspace:
Recommended FTP
Software:
- Macintosh:
Fetch is a file transfer program needed for uploading webpages to
a server. It is FREE software for educators, shareware for others.
- Use Fetch to initially log onto your account and set up
your directories and subdirectories.
- Fetch allows you to view all the files currently on your
server, delete files, rename files, etc:
- Windows:
FTP Explorer is a drag and drop file transfer program that
functions similarly to Windows Explorer.
- FTP Explorer is freeware.
- Like Fetch, it allows you to view all the files currently
on your server, delete files, rename files, etc.
- Download
it from www.download.com.
Steps for
Uploading:
- Save your webserver account hostname, username, password, and
initial path as a shortcut / favorite in your FTP program.
- Open your saved shortcut to connect to the server.
- Create new directories / folders at the root level of your
server directory as desired.
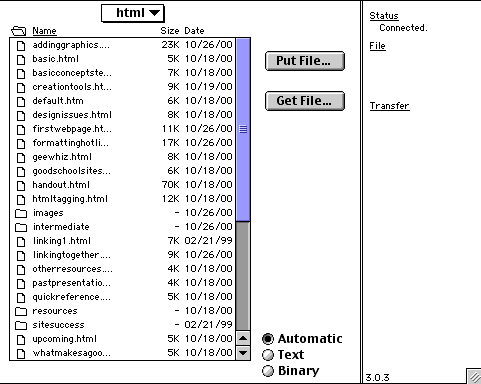
- Use the PUT / UPLOAD buttons to upload files to the server.
- In
Fetch, click PUT FILE to upload single files, or from the
REMOTE menu choose PUT FOLDERS AND FILES to upload multiple
files together.
- In
FTP Explorer, once a directory is created you can drag and drop
files and folders from your desktop into the FTP Explorer
window to upload files.
Alternatively you can use Claris
HomePage to upload your webpages and image files. It will ensure
all images to your document are uploaded and that your links are
correct.
- First, from the "Edit" menu, choose "Consolidate." This will
move all your image files (if desired) into a single folder.
- From the "File" menu, select "Remote" and then select "Remote
Save."
- Enter the information for your server account. This
information is available from your internet service provider. They
should provide you with a domain name and directory pathname, your
user name, and your account password.
- Choose to upload image files by checking the appropriate box.
All image files associated with the webpage you are uploading will
be sent to the server.
- Upload each webpage with these same steps.

 Course
and Website by Wesley
A. Fryer of Lubbock, Texas.
Course
and Website by Wesley
A. Fryer of Lubbock, Texas.
Site sponsored by WesTech
Vision Inc.
 .
.
 .
.